31 May 2012

Last Minute Madness

Hello there!
I hope you have been having a great week! Here on the North Coast I've been trying to (frantically) get organised for the Fat Quarterly Retreat which takes place this weekend in London.
I'm really looking forward to meeting some folks who have become great bloggy friends, making some new friends & learning a thing or two about sewing at the same time! There's a wee linky party going on on the fat quarterly blog & so, for those of you who have just dropped in from the FQ link, you're very welcome! My name is Karen & probably one of the worst organised people you will meet this weekend!
I have nothing packed yet, about 4 loads of washing to iron, meals to organise for hungry teenagers while I'm away & a passport to find! But, at least I've got my priorities in the right place... I got these sample swap notebooks finished
Here's a wee peek inside the London bus ones...
I also managed to finish my name badge:
But that's about it as far as my preparation goes.....I told you I was disorganised! I'll probably be up most of the night doing things I probably should have done long before now (like finishing a backpack I've been working on with the wonderful Summersville fabrics!)
Sorry to keep this short & sweet, but I'll be back on Monday with more news & tales from London
Hope you have a great weekend (& FQR folks see you soon!)
Take care
Karen

27 May 2012

We have a winner!

Hello there!
I hope you had a good week & are enjoying a great weekend! Here on the North Coast of Ireland the sun has been shining & the sun daisies have come out
the farmers have been out cutting the hay
the boys have been camping in the garden
and I've been doing a wee bit of painting.....  transforming this
to this
I've managed to get a wee bit of sewing done too... another notebook cover
But less about me & onto more important things, like the winner of the SMS Giveaway..... Thanks so much to every single one of you who left such nice comments... I really enjoyed reading each one of them & am so thrilled to have met so many new stitchy folk! So.... according to random.org the winner is
Congratulations ravensrascals! I will email you to get your postal address, but for everyone else, please don't be too down-heartened. Believe it or not, I have NEVER won a giveaway :( so you are not alone... But, more importantly, every month for 2012 I have been running a giveaway, so you will have a chance to win something nice in June (& July & August!)
Meanwhile I hope you have a lovely weekend & maybe have time to enjoy the sunset!
Take care
Karen


21 May 2012

Giveaway Day.... Vintage Style!

Hello there!
You may have already caught the giveaway fever...but if not, to-day is Giveaway Day with Sew Mama Sew
This is an incredible event where you can visit lots of wonderful blogs & have a chance to win lots of incredible gifts - handmade bags, accessories, supplies, patterns....the list is endless! For more information just click here. If you have just dropped in via the Sew Mama Sew Blog you are very welcome! My name is Karen & I am so delighted to have you visiting to-day!
This year I will be entering in all the fun with this bundle of gorgeous fat quarters which came from a limited collection produced by Liberty & the Victoria & Albert Museum, London
They really are beautiful & have the usual Liberty soft drape.  I will also be enclosing a lovely vintage booklet which the V&A also produced
If you would like a chance to win these all you have to do is simply leave me a comment if you are or become a follower....  If you follow me on facebook or pinterest do please leave me another comment for another chance to win
That's it, its that simple :)
The giveaway will be open until 25th May 12MN (GMT) & I'll announce the winner through random.org on 26th. Please make sure you are not a "no-reply" blogger, so I can get in touch with you... I am happy to post this internationally
Good luck & hope you have lots of fun in all the other amazing Sew Mama Sew Giveways
Take care
Karen

20 May 2012

Vintage Clutch Tutorial

Hello there
I hope you are having a nice weekend! The sun actually decided to appear here to-day on the Causeway Coast which meant I got lots of washing done, but not too much sewing I'm afraid.... Not to worry though, I had a lovely afternoon planning fabrics & bits & pieces for the Fat Quarter Retreat in a couple of weeks.... so exciting!
To-day I am so thrilled to post a tutorial for the liberty pouch I made, as part of Nova's Liberty Scrap Challenge. Nova blogs over at a cuppa and a catch up & stitches some beautiful & innovative stuff, like this boxy pouch (for her new knitting project!)
or this Bella bag
As if that wasn't enough, she's featured in the Zakka Style book & she recently added this lovely pattern to her repertoire too!
But before I share my tutorial, could I just say a HUGE thank you to each one of you who took the time to comment with such lovely encouraging words about the teeth situation..... I know that in the scheme of things having braces is really no big deal & some of you may have family or friends who are coping with huge physical, mental, or financial problems but I just wanted to let you know how much I appreciate all the kind words....If you don't normally comment on blogs, can I encourage you to do so, even if it is just to say hello....Those few words really do mean a lot to us.....
Right back to the clutch... I've posted a printable version of the tutorial & the template here, but if you prefer to follow on screen, here we go...
Vintage Clutch Tutorial
What You Will Need
" 1 fat 1/8 outer fabric
" 1 fat 1/8 lining fabric
" A small piece of linen for outer (approx. 5” X 3”)
" Fusible fleece (approx. 8.5” X 11”)
" 1 small magnetic snap set (approx. 14mm)
" Key fob ring (optional)
" Usual sewing bits & pieces plus freezer paper, a seam ripper & embroidery thread

When sewing please remember to use ¼” seam allowance throughout (unless otherwise indicated) & backstitch at both ends

STEP 1: Cut Out Your Pieces
Print out the two templates from this document
Vintage Clutch Tutorial Templates

"Trace templates A & B onto freezer paper (or onto card)
" Press freezer paper templates A & B waxy side down on the wrong side of main fabric (or trace round card templates onto fabric) & cut:
D    1 X template A
D    2 X template B
" Press freezer paper templates A & B waxy side down on the wrong side of lining fabric & cut
D    1 X template A
D    1 X template B
" Press freezer paper template B waxy side down on the wrong side of your linen piece & cut out:
D    1 X template B
" You should now have
D    template A: 1 piece in main fabric, 1 piece in lining fabric
D    template B: 2 pieces in main fabric, 1 piece in lining fabric, 1 piece in linen,
" From your fusible fleece cut:
D    1 piece of template A
D    1 piece of template B
D    2 pieces approx. 2” X 2”
D    2 pieces approx. 2” X 4”

STEP 2: Fuse your fleece
" Following your manufacturer’s instructions, carefully fuse template A fleece to the wrong side of template “A” outer fabric
" Repeat with the template “B” fleece & the template “B” linen piece
" If you like, you can add a wee stamp or embellishment to the right corner (approx. 1” from the side). I cut out a wee stamp from an image I had printed onto fabric
" I then just stitched it onto a wee scrap & onto the linen front
STEP 3: Insert Your Magnetic Snaps
" Your snap set should have 4 parts: 2 washers (which won’t be visible) & 2 magnetic snaps. Take the thicker & heavier of the two & one of the washers & your linen piece.
" Using the X on the template as a guide, mark the position of the snap on the OUTER side of the linen piece
" Using the washer as a template, lay it down on the fabric over the X, & mark where you need to make wee holes to be able to insert the magnetic snap prongs easily through the fabric. Use these marks as a guide to where you need to make wee TINCY incisions with your seam ripper.
" Take one of the 2” squares, &, using the washer (back of the magnetic snap) as a template, mark the position of the side slots using your fabric marker. Make small incisions in this with your seam ripper.
" Push the prongs of the magnetic snap through the wee slits in the fabric to the wrong side. Place the backing fabric/interlining over the prongs.
" Push the washer onto the prongs and fold them INWARD
" Take one of the longer 2 X 4” strips of fleece & place it over the back of the snap to protect the snap from rubbing on the other fabric layer
" Now repeat the process again this time with the fabric lining which you have cut into template “A” shape
" Well done! You should now have a lovely neat snap closure J

STEP 4: Making the pocket
" Pin the outer linen piece & one of the lining pieces (template B size) right sides together &  stitch along the top side only
" Repeat this with the other two template B fabric pieces
" Very carefully, cut notches out all along the seam line
" Turn the pieces right side out & press
" If you like at this stage you can top stitch the pocket pieces on both pairs, although I preferred not to, because I wanted to try to keep the vintage look…
" Pin both pocket pairs together right sides out, matching up the notches at the bottom of your pocket pieces & stitch all the way along the sides & bottom using 1/8” seam allowance, remembering to backstitch at both ends
" You should now have a wee half purse which looks something like this:
STEP 5: Preparing your main clutch piece
" You’re nearly ready to put all the pieces together, but first you could add some lace or a wee loop for a key ring if you like.
D    For the lace, simply stitch it all the way round the right side of the outer fabric template “A” piece approx. 1/8” IN from the edge of the piece (you can see a wee peak at that in the photo above) facing inward (so that it will flick out nicely when you put it all together).
D     If you want to add a wee loop, simply take a scrap of one of your fabric pieces approx. 2 1/2” X 8”. Fold the strip in half lengthwise right sides together & stitch along the LONG side. Turn the tube right side out, press & fold in half lengthwise. Insert a ring into your loop and stitch both ends to the right side of the template “A” piece using 1/8” seam allowance

STEP 6: Putting it all together
" Well done! You’re nearly there J
" Carefully pin the pocket pieces on top of the lining template “A” piece, right sides up matching the wee notch & stitch along the pocket sides & bottom using 1/8” seam allowance…you should be sewing over your previous stitch line.. This step just helps keep everything together, if you are confident in your pining & sewing you can omit this stage if you like
" Now take your template “A” outer fabric piece & place it on top of this lining/pocket piece right sides together.
" Using ¼” seam allowance, stitch all the way around the clutch, leaving a gap of approx. 3” in the top left side of the clutch (not the side where you have your loop)…. This will be for turning everything through, so make sure you backstitch at both ends. At a few places you will be sewing through a few layers, so take your time to keep your machine happy J
" Trim notches around the curves at the top & bottom of the clutch
Step 7: Turning it out
" Pull the clutch inside out through the gap in the lining, so that you have the lining fabric & pocket on the inside (right sides out) & the outer fabric inside. Use a pallet knife or something rounded, but not too sharp to poke out your curves & give it a good press
" Using a matching thread, hand stitch closed the turning gap between the lining and your outer piece (ladder stitch is a good one to use for this)
" If you like you could embroider a simple running stitch around the outside using 3 strands of co-ordinating embroidery floss
" Congratulations! You’ve just made a lovely wee vintage clutch!
 
I do hope you have enjoyed this tutorial. If you have any questions, drop me a wee note to birdsongstitches@gmail.com
If you like, you could make a wee card with some of those lovely liberty scraps
Thanks so much for calling in to-day & if you get a free moment, do drop by the Liberty Scrap Challenge flickr group to see some other gorgeous liberty tutorials
Hope you all have a great week
Take care
Karen


19 May 2012

Lovely Liberty

Hello there!
I hope you have had a great week....the weekend will soon be here & hopefully you will get a wee bit of stitching squeezed in somewhere along the way! My week has gone by in a haze of dentist visits, painkillers & smoothies...yes, my mouth is now full of somewhat unsightly pieces of metal... At my age I know you'd think I would have more sense, but I am very self conscious about my teeth  (actually about my face in general to be honest) so hopefully after a year of slushy food & continuous teeth brushing, I'll have, at least, a less crooked smile! (BTW, if you're going to the FQ Retreat I'll be the one trying to stitch with one hand over my mouth!!)
Anyway, in between all of this, I managed to complete a wee challenge the lovely Nova set me a while ago. She is hosting a Liberty Scrap Challenge with the Organic Stitch Company & there are some great tutorials & stitchy projects for you to try here. Anyway, Nova sent me 2 fat eighths of liberty loveliness from Jo's shop & I came up with this:
I showed you the pouch last week, but here it is again with my grandmothers dressmaking book in the background which gave me the original idea..
The fabric was so beautiful & soft.... so I made these notebooks with some of the leftovers
The wee labels were the ones I printed out last week with freezer paper & stamps...


They were so nice to make (although I was pretty dosed with painkillers at the time... so the stitching may not be the straightest!!), I even had enough wee snippets to do this applique card
If you get a free moment, do drop by the Liberty Scrap Challenge to see some of the other lovely Liberty projects that folk have come up with. I'm off to take some more tablets, but I'll be back tomorrow with a tutorial on how to make the pouch & the notelet
Look forward to seeing you tomorrow!
Take care
Karen

11 May 2012

Texting.....On Fabric

Hello there!
I hope you have had a good week (despite the incessant rain if you live in the UK). Here on the Causeway Coast we are bracing ourselves for exam time with our eldest two teenagers about to sit their A levels & GCSEs. So my daily routine has evolved into bedroom patrols to make sure they are studying, cooking nice snacks to keep them going, phone confiscations and lots of encouraging wee chats... ah, the joys of motherhood!
In between all that I have been having a lot of fun with stamps & stencils.....
I'm in the RATZ (rapid & tiny zakka) swap & made this wee snappy pouch for my partner. I used some of the stamped words in the patchwork
I've also used them in a secret swap for someone in our do. Good Stitches bee.... she will be reading this, so I can't say too much more at the moment.....
I'm sort of stuck in text mode (I blame the exam cloud we're living under!!) & so I thought I would show you how to text on fabric another way to-day, this time using your printer & freezer paper. Its really easy to do, but you MUST have an inkjet, not a laser printer ....
  • What you will need: a piece of fabric approx 9 X 11.5" (fine cotton works really well like a Kona, linen is a bit more tricky because of the bumps), freezer paper, starch, computer & INKJET printer
  • Pre-wash & dry your fabric (it helps absorb the ink), cut it to slightly larger than 8.5" X 11"
  • While it is drying, decide on what you wold like to print - there are some lovely images freely available from places like the graphics fairy. Simply open Word or any other word processing programme & copy & paste your images onto your document. I also like to add words in nice font... Just make sure everything is well spaced out by approx 1" so you have room to cut the words/images out.
  • Print your page out once on ordinary paper to make sure you like it etc.... I have found the best images are those in black and white with no colour in the background...
  • Meanwhile, back to your fabric.... When it is dry, spray it with starch & iron carefully - do this for both sides....it should be as smooth as possible
  • Cut a piece of freezer paper 8.5" X 11"
  • Place your fabric onto the shiny side of the freezer paper & iron it on carefully with a medium/hot iron to make sure you have no wee airbubbles....it helps if you are ironing on a very flat surface, like a towel on your kitchen worktop, rather than your ironing board which is a wee bit spongey...
  • Trim the fabric down to the freezer paper size (8.5" X 11"). Make sure there are no wee strands or threads hanging loose as these will get caught in your printer & make a terrible mess:(
  • Place the fabric/freezer paper page into your printer as you normally would, paying attention to wether your printer likes the pages face down or up & simply print your page of images/text... the freezer paper simply gives the printer something firm to print on
  • Once your images are dry, peel off the freezer paper (you can re-use this, so don't throw it out!) Place a piece of parchment paper over the fabric & iron with a hot iron to set the ink.
  • My printer uses water resistant ink - so images & text will not run in the wash. Double check on your cartridge to see what sort of ink you use... If you use regular (non-water-resistant) ink, after heat-setting the images, soak the fabric in a bowl of vinegar for approx 5 mins & then rinse thoroughly. This should set your images for future washes
Here are a couple of projects I've used printed images for:
This was a 50th birthday present for a friend. We all thought of two words to describe Eugene & I printed them on white fabric & added a lovely frame....
This is a stamp I cut out from a set of vintage spool stamps from here 
And this is it on a vintage-style clutch for Nova's Liberty Scrap Challenge
I hope this has inspired you to try out some fabric texting... do have a go - it really is great fun!
Hope you have a lovely weekend
Karen


6 May 2012

Fabric, Stamps & Stencils

Hello there!
I hope you have had a good week. Mine was good, but so busy & I must admit, I'm falling a wee bit behind with some great bloggy adventures which are on the go at the moment... like the Zakka Style Sew Along
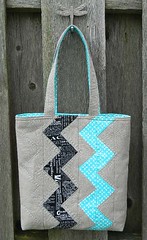
Its a sewalong/ blog hop which each week covers a project from the book... like this tote
Source: s.o.t.a.k handmade
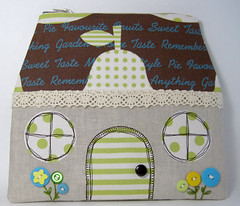
Or this pouch
Source: Elnora
Or this sewing kit
Source: Jeannie
For more inspiration just click here
Meanwhile I've been experimenting with ways to print on fabric & I thought I would share with you a few tips & trips about stamping & stencilling on fabric....

If you have any stamps of cute images, or alphabets, or text these are a great way to add another dimension to your sewing projects. All you need are stamps, a permanent ink pad (either stayzon or versacraft I have found work best), baby wipes, a piece of kitchen roll & your fabric... 
Try to stamp on a larger piece of fabric which you will cut & stitch into your project, rather than stamping directly on a finished piece in case you ruin your stitchy masterpiece :)
When you stamp, bring the inkpad to the stamp so that you don't get too much ink on your stamp. Check before you stamp onto the fabric to make sure there is no excess ink on the stamp around the shape - if there is, just give it a wee wipe with the tip of your kitchen roll
Be sure to clean the stamps after every stamp with your baby wipes to keep them nice :)
You can also use stencils & sharpie pens for text if you like
This is a really inexpensive & creative way to incorporate words into your projects.
To set the stamps (or stencils) press for approx 3 seconds on the REVERSE side of the fabric that you have stamped using a hot iron & then press again on the RIGHT side for 3 seconds.
These are a few tips, but I would recommend that you first use a scrap of material & practice a wee bit so you get used to it (& not ruin any of your lovely material!)
These are some of my experiments with inkpads & you will see how some maintained their colour, while others faded.
I hope this will give you a wee incentive to get stamping - it really can be a lot of fun...If you call back in a day or two I'll show you some of the bits & pieces I've made with some stamps
In the meantime I hope you all have a great week &, if you live in the UK, have a relaxing bank holiday Monday
Take care
Karen