
I hope you have had a good week. Mine was good, but so busy & I must admit, I'm falling a wee bit behind with some great bloggy adventures which are on the go at the moment... like the Zakka Style Sew Along

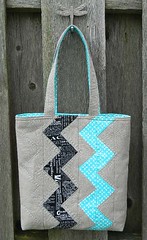 |
| Source: s.o.t.a.k handmade |
 |
| Source: Elnora |
Or this sewing kit
 |
| Source: Jeannie |
Meanwhile I've been experimenting with ways to print on fabric & I thought I would share with you a few tips & trips about stamping & stencilling on fabric....


Try to stamp on a larger piece of fabric which you will cut & stitch into your project, rather than stamping directly on a finished piece in case you ruin your stitchy masterpiece :)
When you stamp, bring the inkpad to the stamp so that you don't get too much ink on your stamp. Check before you stamp onto the fabric to make sure there is no excess ink on the stamp around the shape - if there is, just give it a wee wipe with the tip of your kitchen roll
When you stamp, bring the inkpad to the stamp so that you don't get too much ink on your stamp. Check before you stamp onto the fabric to make sure there is no excess ink on the stamp around the shape - if there is, just give it a wee wipe with the tip of your kitchen roll

Be sure to clean the stamps after every stamp with your baby wipes to keep them nice :)
You can also use stencils & sharpie pens for text if you like

This is a really inexpensive & creative way to incorporate words into your projects.
To set the stamps (or stencils) press for approx 3 seconds on the REVERSE side of the fabric that you have stamped using a hot iron & then press again on the RIGHT side for 3 seconds.
To set the stamps (or stencils) press for approx 3 seconds on the REVERSE side of the fabric that you have stamped using a hot iron & then press again on the RIGHT side for 3 seconds.
These are a few tips, but I would recommend that you first use a scrap of material & practice a wee bit so you get used to it (& not ruin any of your lovely material!)

These are some of my experiments with inkpads & you will see how some maintained their colour, while others faded.
I hope this will give you a wee incentive to get stamping - it really can be a lot of fun...If you call back in a day or two I'll show you some of the bits & pieces I've made with some stamps
I hope this will give you a wee incentive to get stamping - it really can be a lot of fun...If you call back in a day or two I'll show you some of the bits & pieces I've made with some stamps
In the meantime I hope you all have a great week &, if you live in the UK, have a relaxing bank holiday Monday

Karen
Great tips K! I'd love to get more into stamping but I find them so fiddly and messy! Yours are lovely. Enjoy tomorrow! Jxo
ReplyDeleteThanks for the stamping info and tips. I am going to have a go at this! Di x
ReplyDeleteAww man, why don't I have a bouncy castle to relax on?! (Keeping up with the generally esoteric nature of my comments ;o) )
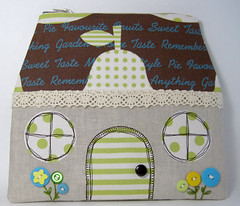
ReplyDeleteThanks for sharing my little Zakka House Pouch, Karen! I'm honored!
ReplyDeleteOooh lovely stamping!
ReplyDeleteOooooh, I'm going to refer to this post sometime soon to try stamping fabric. The information is so specific and helpful, and your stamps are so sweet. Can't wait to see what you're making for the sew along!
ReplyDeleteI need to get more alphabet stamps. You can also use your markers to colour the stamps if you don't have the right colour of stamp pad.
ReplyDeleteThanks for the tips Karen, I am really getting into stamping but I have found my versaink pad doesn't stay well after washing. Im off to order a stayzon one!
ReplyDeleteThanks for the stamping tips :-)
ReplyDeleteKaren, just found your lovely blog via our London Flickr Group! Thanks for explaining the stamping, I have some cute stamps that I never use - just have to buy some permanent ink and I am ready to start! Will have to doublecheck where to store the inkpad though, my boys love stamping as well :o)))
ReplyDelete