Hello there!
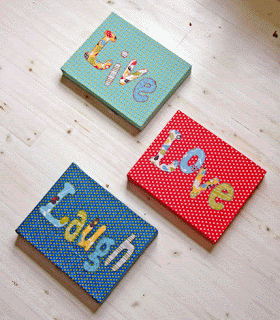
Last night while the wind was howling & the cows were mooing & the McGinty (our wee dog) was barking, I sat down in my wee craft corner & made these:
They are a gift for the children's leader in our church who Hannah worked for over the summer & who exudes kindness, fun & laughter in everything he does. I gave them to him this morning & they are now up on his office wall.
I really enjoyed making them, they are so easy & quick to do. I know how you all love a tutorial, or in case you would like to make them yourself, I thought I would share with you how I did it, so here goes....
WALL ART (not so) TINY TUTORIAL
Step One: What you will need
- Fabric for your background (this will need to be approx 3" wider and longer than your canvas size)
- Assorted scraps for your letters
- Double sided fusible web applique paper something like Steam-a-Seam or SoftFuse. Remember if you are going to stitch round the letters your fusible web should be the "lite" variety or you may have difficulty sewing through it
- A canvas frame - you can pick these up fairly cheaply from most DIY or general stores or somewhere like IKEA, or you could use a wooden photo frame. If you are using a wooden frame you will also need a piece of not so good backing fabric (like lining material or something inexpensive) the same size as your wall art background.
- An iron
- A light box if you have it
- Sharp scissors
- A staple gun
Step Two: Designing your wall art
One of the easiest ways to do this is using your computer. Decide what words or pictures you want to put on the wall art & then simply use Word to make an A4 one-page document & type on it the words you want on your wall art. You can also download images etc from various online sources to include if you wish.
Check the size of your canvas with an A4 page and modify your font size so it is centered and filling as much of the canvas as you would like. The canvas I used for these are 12"X9", so it was easy to work out if my letters were the right size & not too big or small for the canvas...
Once you are happy with how it looks on the page, print the page out. (If you are confident in your writing, you can skip of all of this and just write out the letters)
Step Three: Creating your letters
TURN YOUR A4 PAGE WRONG SIDE UP
Using your light box (or just tape the A4 page to the window) trace the REVERSE image of the letters onto the fusible web paper and with a sharp pair of scissors, cut your letters/shapes out slightly larger than the letter & fuse them onto the back of your fabric scraps. For best results follow your manufacturers instructions here for fusing as I have a couple of brands at home and they differ slightly.
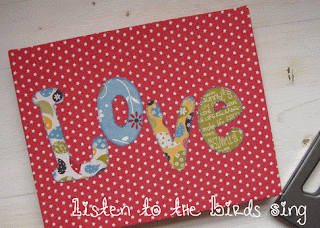
Cut neatly around your letter/shape outline & remove the fusible web backing paper & place your letters on the backing fabric taking time to check with your Word document that you have spaced them correctly.
Once you are happy with your placement, fuse the letters/shapes onto the backing fabric again following the manufacturers instructions.
Step Four: Appliqueing your letters
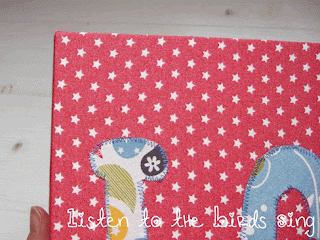
You may want to applique your letters either by hand or machine. I used a zig zag stitch for mine, but you could use any stitch you fancy here. Be sure you sew in your threads & don't knot them as they will make your canvas a wee bit bumpy!
(At this stage if you are using a photo frame you need to stitch your nice fabric with your applique onto your not so nice inexpensive piece so that it will add support to your nice one. If you are using a canvas frame don't worry about this wee bit)
OK... so far so good? Now switch off your machine, roll up your sleeves & get ready for some staple gun fun!
Step Five: Attaching your canvas sides
Iron your appliqued fabric to make sure you have no wrinkles (believe me they will show!) & take a wee bit of time to position your fabric on your canvas, making sure your canvas is not wonky.
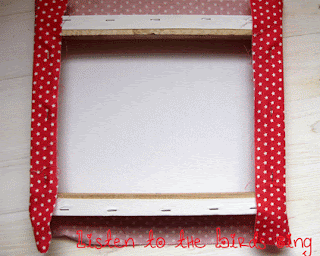
Turn the canvas over and keeping the fabric in the right position staple gun it once to the frame. Only do it once, just in case you have to remove the staple & reposition your fabric (I'm sure you won't need to but just in case......)
Flip it over just to check everything still looks OK on the right side
If it looks grand flip it back again, &, keeping your fabric firmly taught, staple gun it evenly to the opposite frame piece...
The key here is to keep everything evenly taught, otherwise you may distort or twist your lovely design.

Hows it looking? Good... OK lets do the other two sides
Step Six: Attaching the canvas top & bottom sides
Using the same technique as before, holding your fabric taught, staple it once to one side, keeping it uniformly taught, staple it to the opposite side
Step Seven: Finishing off with the corners
Fold your corners just as you would wrap a present and add about 3 staples to secure them firmly and evenly.
Don't worry.... it doesn't have to be perfect, it just has to look smooth from the front.
Repeat this present wrapping technique for the other corners

Step Eight: Stand back and admire you work!
Phew! Sorry this was a bit more wordy than I had planned, but I hope you enjoyed it and have fun making lots of wall art! Go on.... and let me know how you get on!
PS... Lots of love to my wee bloggy friend who had surgery today & should be soon back to blogging!!!!


