Showing posts with label sew. Show all posts

3 May 2014

Bagalicious: Schooldays Notebook Tote Tutorial

Hello there & welcome to May!
I hope you are enjoying the first days of May. Over here, May has brought a sad day for me & a happy day for my son - his last day of school!! (Isn't it funny how us mummys get so sad when another stage of childhood is gone, but our children can't wait for the next one!)
As the end of school approaches, I thought I should get organised with some teacher appreciation gifts, so I sat down & stitched these the other day
They're reversible too
They are made out of canvas, so they're nice & sturdy for books
  
Wouldn't it make a nice teacher appreciation gift?

If you fancy making one, here's a tutorial to help you on your way, or if you like you can access a printable version here

listen to the birds sing

This tutorial will guide you through the process of making basically two bags, joined at the top one with a notepaper effect and an alternative, so that the bag can be reversed as desired. Heavier weight cotton or canvas would be ideal fabrics. A quicker option would be to use cotton webbing, instead of making straps.
 What You Will Need             
" 19” X 32” cream/white canvas fabric for the outer bag
" 19” X 32” co-ordinating fabric for the reversible bag
" Usual sewing bits & pieces plus:
red, blue & cream thread
air erasable fabric pen/chalk               

When sewing please remember to use ¼ seam allowance throughout (unless otherwise indicated) & backstitch at both ends                                        
STEP 1: Cut your bag pieces
" Cut from your cream fabric:
_    One piece 15½” X 32” for the main bag piece
_    From remainder (or webbing), cut two strips 1¾” X 23 for the straps
" From your lining fabric:
_    One piece 15½” X 32” for the main bag piece lining
_    From remainder, cut two strips 1¾” X 23 for the straps
 

STEP 2: Making the “notepaper” fabric
" Starting 2½” in from the edge of a long side, mark 7 lines running the length of the fabric, spacing them 1½” apart. You will have a 4” space at the top
" Using blue thread, stitch along these lines. Stop approx. 1/8” from the edge & sew down to the next line (this will help you not have too many threads & the connecting line will be stitched in the seam). You now have some lines on your fabric… next we need a couple of margins…
" Fold the fabric in half lengthwise & draw a line 2½ from the FOLDED side & a line 2¾ from the RAW edge side
" Using your red thread stitch down these two lines twice (just to make the “margin” stand out a bit more)
STEP 3: Making your outer bag
" Fold your “notepaper” fabric in half lengthwise right sides together, being careful to match the blue lines. Stitch down the raw edges using ¼” seam allowance (so that you catch the blue side stitches in the seam) & along the bottom raw edge.
" To make the corners, take the bottom seam & the side seam, & place together to make a triangle. Measure carefully to make sure that the same amount of fabric is on both sides of the seam & iron to keep it nice & flat.
" Measure 2” down from the tip of the triangle & draw a straight line across the fabric (you should have 2” on each side of the seam). Sew on top of the marked line (this should be a total of 4”).
" You can either trim the excess fabric in the corners, or leave is as it is… (I prefer to leave it for the outer bag & trim for the reverse bag).
" Repeat this for the other corner of the bag.
" Well done! You’ve made your outer bag! J
 Step 4: Making the reverse bag
" Repeat step 4, but leave a gap of 4in the bottom seam (which you will use for turning the bag through later)
Step 5: Making the straps (if not using webbing)
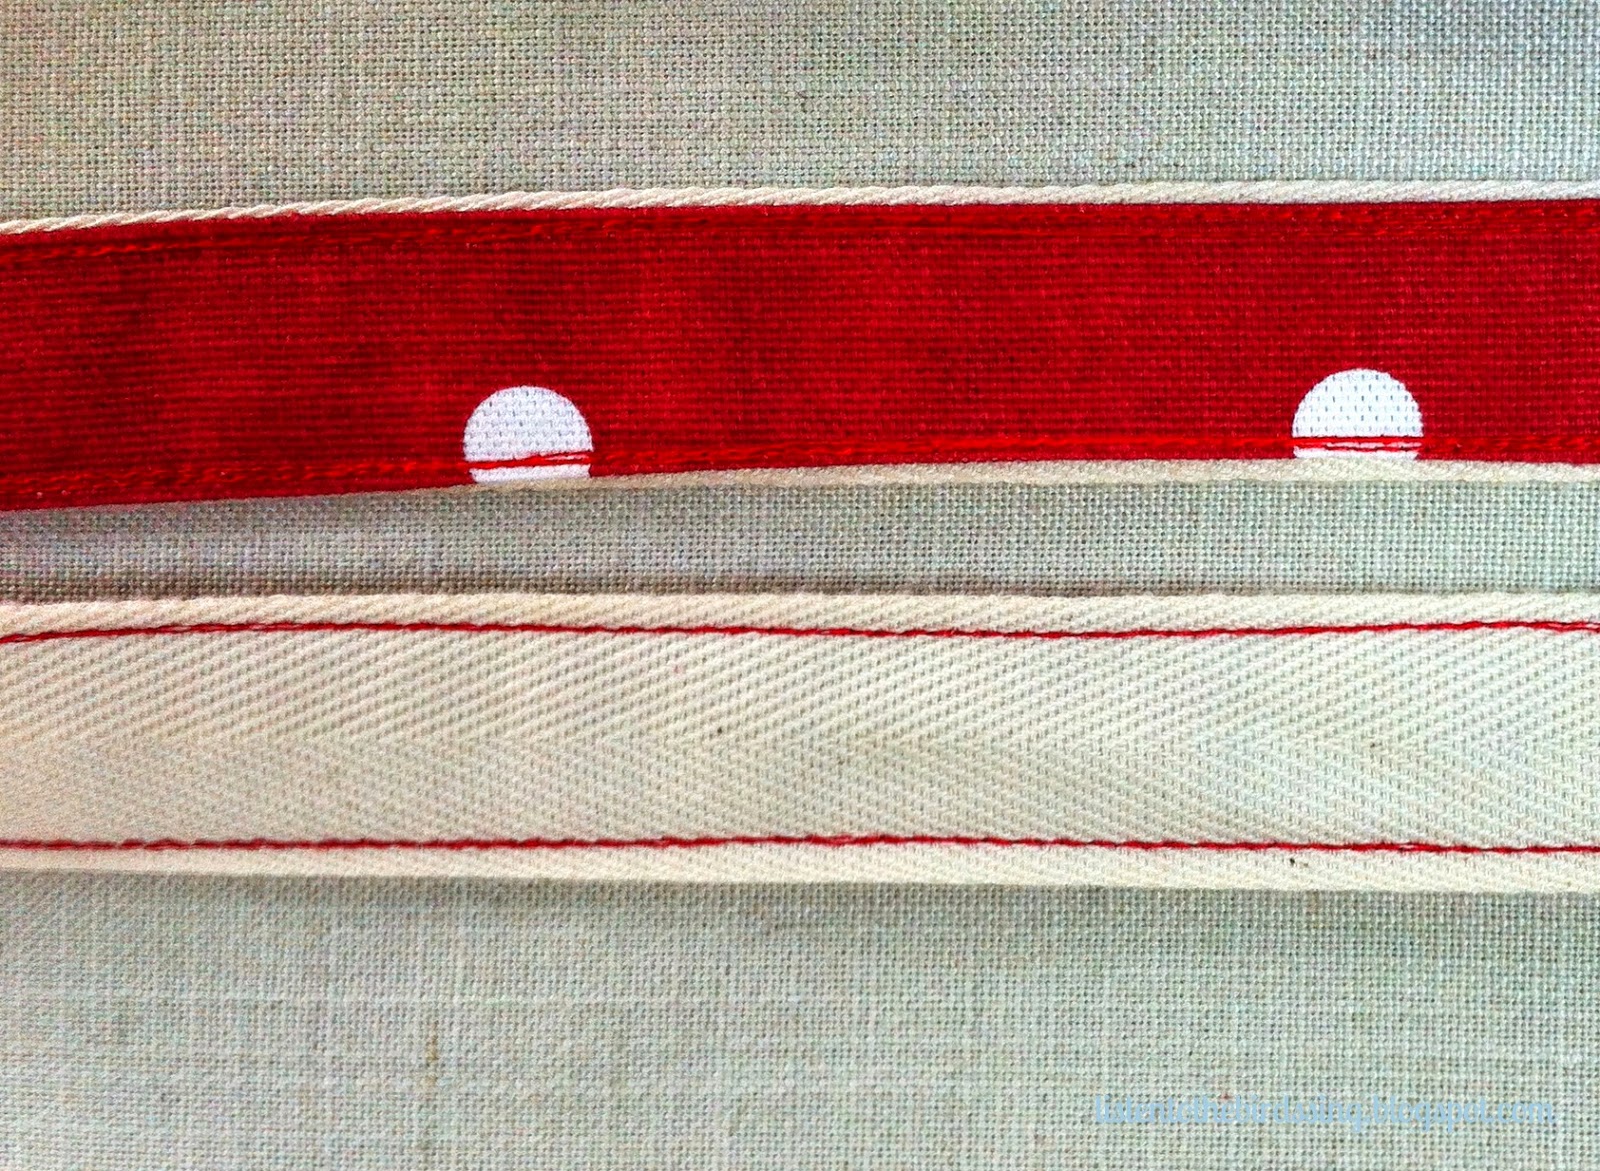
" Take the four fabric strap pieces & fold in half lengthwise wrong sides together. Press along fold
" Open up and fold in ¼” at each side. Press along fold
" Take one lining strap & place an outer strap carefully on top WRONG SIDES together. Pin in place
" Stitch down each side of the strap 1/8” from the edge. Go over stitching row, or down the middle of strap if desired
" Take your reverse bag right side out & fold in half to find the midpoint of the bag
" With right sides together, pin straps to the reverse bag 3” from the midpoint
" Stitch in place with 1/8” seam, go over seam line again to reinforce

Step 6: Putting it all together
" Place bag outer (RIGHT SIDE OUT) inside the reverse bag (WRONG SIDE OUT) & carefully match up, making sure your handles are tucked down out of the way. Stitch all the way around using ¼” seam allowance
" Pull the bag through the gap in the reverse bag & hand-stitch the gap closed using a ladder stitch.
" Push the reverse bag into the outer bag & press.
" Topstitch around the bag edge with 1/8” seam & 1/4” seam.
" Press the bag again & sit back & admire your work!
  
I hope you have enjoyed this tutorial & have lots of fun with this stitchy schooldays notebook tote.... but please be kind & do not reproduce it without permission. If you make one (or two) I'd love to hear how you get on :)
Take care & have a lovely weekend

Karen

21 June 2012

Sunshine (and showers) Tote

Hello there!
How has your week been so far? Have you had sunshine? Or showers? Or both?? I'm writing this post from a wee island off the North Coast of Scotland called Orkney (which is where my great grandparents came from) & as I write this the rain is pouring down & there are wee streams of rainwater trickling over the cobbled stones... But at least the plants in the gardens look happy!!

This week in between exam runs & the rain, I've been busy finishing off a surprise for someone in our do. Good Stitches bee

I designed the bag expecially for this person & I really enjoyed making it.. It has a lovely curvey bottom....
I used some of the printed text I made a couple of weeks ago & lots of my favourite fabrics which I quilted individually
The front has a large padded pocket with a snap closure (which might be good for the recipients camera!!)
There's another zipped pocket inside & a wee key fob too
I used fusible fleece to make it nice & squishy & am really hoping that the person who I've sent it to will like it...
Here's Hannah modelling it to give you an idea of the size
I was thinking of maybe making a pattern for this - I'd love to know what you think....
If all these photos have given you a taste for totes, check out Sara's Purse Palooza at Sew Sweetness. There are lots of fantastic purse reviews, tips & tricks & prizes too...Here's the list from to-day onwards

June 21 - Katy @ The Littlest Thistle (Noodlehead 2-4-1 Tote)
               Terri @ Sew-Fantastic (In Color Order Lined Drawstring Bag)
June 22 - Elizabeth @ Don't Call Me Betsy (Amy Butler Weekender Bag)
               Sarah @ Fairy Face Designs (bag from the Bag Making Bible)
June 25 - Amy @ Sukie Don't You Know Who I Am? (Amy Butler Sophia Bag)
                Laurie @ On the QT - Quilting Tangents (Betz White Hexie Hipster)
June 26 - Julianna @ Jednoiglec (Charlie's Aunt Kitchen Garden Bag)
               Jeni @ In Color Order (Bari J. State Street Tote)
June 27 - Kerry @ Very Kerry Berry (bag from Suzuko Koseki)
               Michelle @ I Like Orange Too (Left Bank Granny Bag)
June 28 - Kay Whitt @ Sew Serendipity Studio (tutorial: adjustable strap with metal slider)
               Amy Barickman @ Indygo Junction (tutorial: installing grommets/magnetic snaps)
June 29 - Melissa @ Bittersweet Designs (Bella Nonna Boutique Shoulder Bag)
                Kelly @ Kelby Sews (Pat Bravo Paris Bag)
                Bianca @ Sweet Diesel Designs (Lisa Lam For Pleat's Sake)

There are some great prizes for completed bags too, including....
1st Prize
* $50 gift certificate from Fat Quarter Shop         
* 3-pack of books from Martingale Publishing
* $50 gift certificate to Zipit
* $70 Pellon gift pack
* fat quarter bundle and sewing pattern from Art Gallery Fabrics
 
* fat quarter bundle and sewing pattern from Art Gallery Fabrics
* 3-pack of books from Martingale Publishing
* $50 gift certificate from Sew Fresh Fabrics
* $30 gift certificate to Spoonflower
* fat quarter bundle from Art Gallery Fabrics
* 2-pack of books from Lark Crafts Publishing
* $80 prize pack from Olfa Cutting Tools

I'm off now to explore Stromness... I'll take some photos to show you, but in the meantime click here to see Katy's review of the 241 Tote
Hope you have a lovely day
Karen

1 November 2011

Fresh Sewing Day

{october}
Fresh Sewing Day
A month of swappy fun:

A month of Christmas creativity

A month of amazing kindness

1. Not available, 2. From-Terri, 3. Cindy's blocks, 4. McGinty Trying To Help!, 5. Some loveliness from Ros, 6. Boys Quilt Top, 7. Not available, 8. Kind Stitches Blocks From Cindy, 9. Not available, 10. Pastel Bloom Quilt, 11. Not available, 12. Dino Quilt13. Not available

A month of lovely walks (in between the showers)
So how was your October?
If you get a moment, drop by Lyne's Fresh Sewing Day to see some of the lovely stuff other folk have made...
Hope you have a lovely day
Karen

30 October 2011

Creative Christmas Scrappy Tutorial

Hello There!
I hope you've all had a great weekend &, if you're living in the UK, that you've enjoyed your extra hour in bed this morning!
I'm so pleased to bring to you the next Creative Christmas project....
This is a lovely, quick wee project which you can whip up from scraps with your children on a misty Autumn night, sitting round the fire, watching an old movie....
I've posted the tut in the Creative Christmas page... so to get to it just click here
The great thing about these is that you can be as creative as you like..
I hope you get a chance to make a couple of these lovelies!
Hope you all have a wonderful week!
Thanks so much for stopping by!
Karen