Hello there
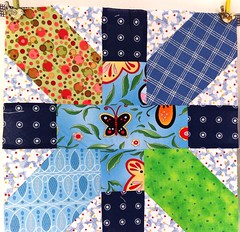
How are things with you? Over here life has been so busy...children going back to school, big exams looming, birthday parties... the usual family stuff. Although I haven't managed to do much blogging, I've been up to lots of stitchy stuff....like this wee quilt for my
Doll Quilt Swap partner
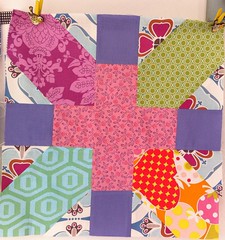
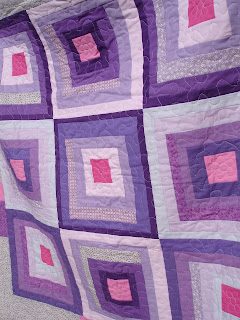
This was round 12 of the Doll Quilt Swap & we could choose 1 of 6 types of blocks...hopefully my partner will like these scrappy log cabins... I also used one to make a co-ordinating wee zippered pouch
Swaps are such fun - they are a great way to meet folks and try out something new for someone new.... a bit like this boxy pouch I made for my
pretty {little} pouch swap partner who wanted something to hold her art brushes
My problem was, once I started I couldn't stop...
Although this lot of lovelies are off to a top secret location I thought I would share with you a tutorial for how to make the flat pouch... it really is the simplest, quickest pouch I've made.
If you have never tried your hand at zips, have a go with this one. You don't have any awkward zipper ends to sort out!
I've uploaded a pdf of the tutorial for you to print out
here on the tutorial page but I know some of you prefer to see it on the blog, so here it is.... I hope you enjoy it!
Super Simple Flat Zippy Pouch Tutorial
What You Will Need
2 pieces outer fabric 5” X 7 ½”
2 pieces lining fabric 5” X 7 ½ ”
A small piece of co-ordinating fabric for tabs (approx. 5” X 3”)
2 pieces fusible fleece 4 7/8” X 7 3/8” (ie 1/8” shorter lengthwise & 1/8” shorter widthwise than your outer & inner fabric pieces)
1 zip measuring at least 8” long
Usual sewing bits & pieces plus zipper foot
(When sewing please remember to use ¼” seam allowance throughout (unless otherwise indicated) & backstitch at both ends)
STEP 1: Fuse your fleece
Take one of the fusible fleece pieces & carefully fuse onto the wrong side of one of your outer pouch pieces – you should have approx. 1/16” space all the way round your outer pouch piece (this will make sure the fleece doesn’t get in the way when you match your fabric pieces up later)
Repeat with the other fleece & outer fabric pieces
STEP 2: Attach the zipper
Pin your zipper to one outer fabric piece right sides together. Using your zipper foot, stitch the zipper along the top of the fabric using 3/8” approx. seam allowance
Place one of your lining pieces on top of this zip/ fabric layer right sides together. Stitch along the top of the lining using approx. 4/8” seam allowance (it should be slightly more than your previous seam allowance)
You should now have now two stitch lines visible on the wrong side of the outer fabric like this
Press both pieces away from the zip & topstitch approx. 2/8” away from the edge of the outer fabric using a slightly longer stitch length (I usually change mine from 2.5 to 3)
Repeat these steps for the other outer & lining fabric pieces on the other side of the zip
Great! You should now have something which looks like this on the outer side:
and this on the other side:
STEP 3: Making the flat pouch shape
Pin the two lining pieces right sides together & the two outer pieces right sides together
Using your normal foot & ¼” seam allowance, stitch along the bottom (long) side of the outer pouch pieces
Do the same thing for the lining pieces but stop after approx. 2” & backstitch, then leave a gap of approx. 3” & continue on to the end of the pieces, again remembering to backstitch at both ends (this gap is what you will use to turn the pouch right side out in a wee moment or two)
Take your fabric & layers & refold so that the zip is in the middle, the lining is on the top layer with the gap in the middle of the top layer & the outer fabric on the bottom with the seam line running down the middle (its a lot less complicated than it sounds!!)
You will see from this photo that the seam from the outer layer is centred directly on top of the zip which is centred directly on top of the seam from the lining. Once you are happy with this placement, pin & press in place
Step 4: Making the tabs
Fold your co-ordinating piece right sides together along the length of the fabric scrap and stitch the two raw edges together...you should now have a tube. Turn right side out & press
Cut into two equal pieces (these should be approx. 2 ½” X 1 ¼”). Fold in half & press
Step 5: Inserting the tabs
Take one of the folded tabs &, with the folded edge facing in, sandwich it between the outer pouch layers, raw edges together
Holding the rest of the fabric out of the way, attach the tab to the non-zip side of the pouch outer layer using 3/8” seam allowance.
Repeat this with the other tab at the other end of the outer fabric layer. Trim the zip ends in line with your raw edges
NOW OPEN YOUR ZIP UP HALF WAY ALONG (if you don’t, life is going to getting pretty tricky in a moment or two....)
Pin the outer fabric layers together to the lining panels, making sure your seams & zip are all still centred on top of each other. Now stitch down each side using ¼” seam allowance. You will be sewing over top of the zipper, so take your time.
Step 6: Turning it out
Well done! You’re nearly there!
Pull the pouch inside out through the gap in the lining, so that you have the lining fabric on the outside (right sides out) & the outer fabric inside. Use a chopstick or something not too sharp to poke out your corners & give it a good press
It should look something like this:
Turn the pouch over & hand stitch closed the gap in the lining (ladder stitch is a good one to use for this)
Again turn the pouch right side out through the open zip, so that the lining is all nicely tucked inside your lovely new pouch. Poke again with your chopstick to get those corners nice & press one more time. It should look something like this on the front
And this at the back
Congratulations! You now have a lovely flat zippered pouch :)
I hope you enjoyed this wee tutorial & apologies for the length of this post....have a great week
Take care
Karen