I hope you have had a good week (despite the incessant rain if you live in the UK). Here on the Causeway Coast we are bracing ourselves for exam time with our eldest two teenagers about to sit their A levels & GCSEs. So my daily routine has evolved into bedroom patrols to make sure they are studying, cooking nice snacks to keep them going, phone confiscations and lots of encouraging wee chats... ah, the joys of motherhood!
In between all that I have been having a lot of fun with stamps & stencils.....
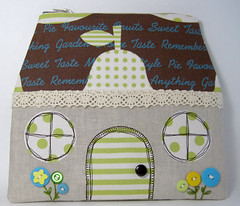
I'm in the RATZ (rapid & tiny zakka) swap & made this wee snappy pouch for my partner. I used some of the stamped words in the patchwork

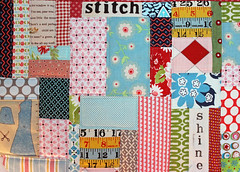
I'm sort of stuck in text mode (I blame the exam cloud we're living under!!) & so I thought I would show you how to text on fabric another way to-day, this time using your printer & freezer paper. Its really easy to do, but you MUST have an inkjet, not a laser printer ....

- What you will need: a piece of fabric approx 9 X 11.5" (fine cotton works really well like a Kona, linen is a bit more tricky because of the bumps), freezer paper, starch, computer & INKJET printer
- Pre-wash & dry your fabric (it helps absorb the ink), cut it to slightly larger than 8.5" X 11"
- While it is drying, decide on what you wold like to print - there are some lovely images freely available from places like the graphics fairy. Simply open Word or any other word processing programme & copy & paste your images onto your document. I also like to add words in nice font... Just make sure everything is well spaced out by approx 1" so you have room to cut the words/images out.
- Print your page out once on ordinary paper to make sure you like it etc.... I have found the best images are those in black and white with no colour in the background...
- Meanwhile, back to your fabric.... When it is dry, spray it with starch & iron carefully - do this for both sides....it should be as smooth as possible
- Cut a piece of freezer paper 8.5" X 11"
- Place your fabric onto the shiny side of the freezer paper & iron it on carefully with a medium/hot iron to make sure you have no wee airbubbles....it helps if you are ironing on a very flat surface, like a towel on your kitchen worktop, rather than your ironing board which is a wee bit spongey...
- Trim the fabric down to the freezer paper size (8.5" X 11"). Make sure there are no wee strands or threads hanging loose as these will get caught in your printer & make a terrible mess:(
- Place the fabric/freezer paper page into your printer as you normally would, paying attention to wether your printer likes the pages face down or up & simply print your page of images/text... the freezer paper simply gives the printer something firm to print on
- Once your images are dry, peel off the freezer paper (you can re-use this, so don't throw it out!) Place a piece of parchment paper over the fabric & iron with a hot iron to set the ink.
- My printer uses water resistant ink - so images & text will not run in the wash. Double check on your cartridge to see what sort of ink you use... If you use regular (non-water-resistant) ink, after heat-setting the images, soak the fabric in a bowl of vinegar for approx 5 mins & then rinse thoroughly. This should set your images for future washes

This was a 50th birthday present for a friend. We all thought of two words to describe Eugene & I printed them on white fabric & added a lovely frame....
This is a stamp I cut out from a set of vintage spool stamps from here

And this is it on a vintage-style clutch for Nova's Liberty Scrap Challenge

I hope this has inspired you to try out some fabric texting... do have a go - it really is great fun!
Hope you have a lovely weekend
Karen